

Author: Cat Cooley
Easy Winter Crafts for Kids to Keep Them Busy Before Dinner
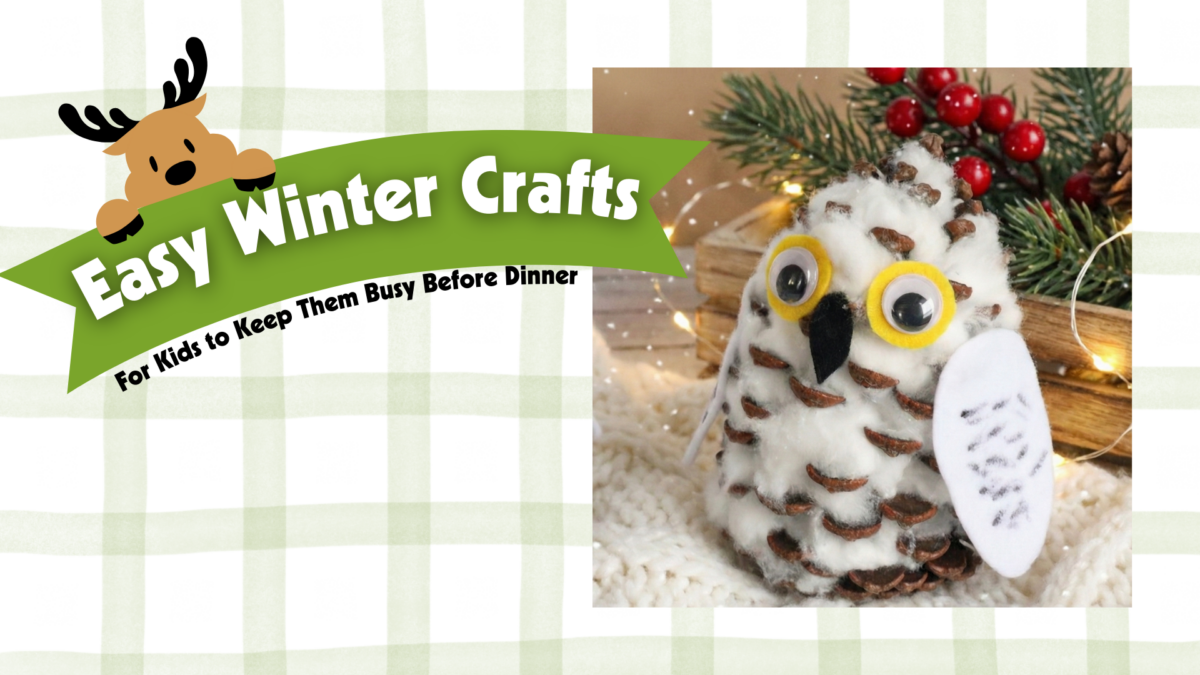
During the winter season, kids are often looking for something fun to keep them busy—and that’s where easy winter crafts for kids come in handy. This Snowy Owl Pine Cone Craft is the perfect mix of easy, adorable, and low-mess, making it an ideal activity. All you need are a few basic supplies and a handful of cotton balls to transform an ordinary pine cone into a fluffy little owl.
Before we jump into the steps, let’s walk through what makes this craft such a great choice: it keeps kids entertained, encourages creativity, and results in a charming fall decoration they’ll be excited to show off.

Supplies
- Medium sized Pine cones
- Black, yellow, and white felt
- Large Googly eyes
- Sharpie marker
- 15 Cotton balls per Owl
- Hot glue or Tacky Glue
Directions
Now that you’ve gathered your supplies, it’s time to bring these cute snowy owls to life. These steps are simple enough for kids to follow with just a little guidance—especially if you’re using tacky glue instead of hot glue.
- Prep Your Pine Cones – Make sure each pine cone is clean and dry. Shake out any loose pieces so the cotton will adhere well.
- Add the Fluffy Owl Feathers – Pull apart the cotton balls slightly, then tuck small pieces into the gaps of the pine cone. Cover the entire pine cone until it looks soft and snowy, leaving the bottom open so it sits flat.
- Create the Face – Cut a small yellow felt triangle for the beak and two white felt circles for the eye bases. Use the sharpie to outline the edges if your child wants extra detail.
- Attach the Eyes – Glue the white felt circles onto the front of the pine cone, then add the large googly eyes on top. Place the yellow felt beak just below the eyes.
- Add Wings and Feet (Optional) – For extra personality, cut small wing shapes from black felt and glue them to the sides. You can also cut two tiny felt feet to glue at the bottom.
- Let It Dry – Allow the glue to fully dry before moving the owl. If you’re using hot glue, this step will be quick; tacky glue may take a bit longer.
Once the owl is dry, your kids will have a charming fall decoration that’s perfect for the table, mantel, or even as part of a Thanksgiving centerpiece.
Conclusion
With your snowy owl pine cones complete, your kids will feel proud of the whimsical woodland creatures they’ve created—and you’ll enjoy a little extra time to focus on dinner. This craft is simple, cozy, and full of seasonal charm, giving kids a fun way to participate in the holiday atmosphere.
As you wrap up this activity, encourage the kids to display their owls somewhere special or gift them to family members arriving for dinner. It’s a sweet way to spark conversation and celebrate their creativity.
And just like that, you’ve kept little hands busy, added a touch of fall magic to your home, and created a memory that makes the holidays feel even more meaningful.
DIY Lava Lamp for Kids: At Home Science Fun

Get ready to make your very own DIY Lava Lamp for Kids! With just a few simple supplies, you can create a jar that bubbles, swirls, and moves like magic. This fun experiment is safe, easy, and super cool to watch.
Not only will you get to enjoy the colorful bubbles floating up and down, but you’ll also learn a little science along the way. It’s a mix of fun and learning all in one!
Are you ready to watch your homemade lava lamp come to life? Let’s get started!

Ingredients:
Here’s what you’ll need to light up the night with a glow jar.
- Clear glass or plastic jar with a lid (mason jars are ideal)
- Warm water
- Vegetable oil (canola, sunflower, or similar)
- Glow-in-the-dark paint (washable and non-toxic is best)
- Food coloring (optional, for color enhancement)
- Fork or toothpick (for stirring and breaking up paint droplets)
- Small bowl (for mixing oil and glow paint)
- Optional: Blacklight (to amplify the glow effect)

Directions:
Get ready for a science show in a jar!
- 1. Fill the Jar
- Start by filling your jar about three-quarters full with warm water. The warmth of the water helps the paint droplets spread and “explode” more easily once they enter the liquid.
- Make sure not to use boiling water—just warm enough to slightly enhance the fluidity and movement of the glow paint once it is added.
- 2. Mix the Glow Paint with Oil
- In a small mixing bowl, combine 2 to 3 tablespoons of vegetable oil with a few small drops of glow-in-the-dark paint. If you want to add more color to your show, include a couple of drops of food coloring.
- Use a fork or toothpick to gently stir the mixture. You’ll notice that the glow paint breaks up into tiny droplets suspended in the oil. This separation is key to creating the visual effect.
- Avoid mixing too vigorously—what you want are small globules, not a fully blended mixture.
- 3. Combine the Mixtures
- Carefully pour the oil and glow paint mixture into the jar of warm water. The oil will float on the surface of the water, and over time, the droplets of paint will slowly descend.
- As they sink, they’ll begin to burst and swirl into tendrils of glowing color. This moment is the highlight—the glowing droplets imitate fireworks in slow motion, gently unfolding beneath the water’s surface.
- 4. Observe the Display
- Turn off the lights or dim them significantly. If your paint has been charged by light beforehand, it will emit a soft, glowing light as it moves through the water.
- 5. Recharge and Reuse
- As the glow fades over time, simply recharge the paint by placing the jar under a strong light source such as a lamp or in direct sunlight for a few minutes. The glow will return when the lights go off again.
This eye-catching experiment introduces kids to liquid density and immiscible substances—while also looking seriously cool.
The Science That Makes It
When you do this experiment, you’re not just making something pretty—you’re also doing science! Here’s what’s going on inside your jar:
Floating and Sinking
Oil is lighter than water, so it always floats on top. The glow paint is heavier than oil but not as heavy as water. That’s why the paint hangs in the middle for a bit before slowly sinking down, making the “fireworks” effect.
Why Oil and Water Don’t Mix
Water and oil are like kids who don’t want to hold hands. They’re just too different! Because of this, the paint droplets don’t mix in. Instead, they stay separate and move through the water slowly, which makes them fun to watch.
How the Glow Works
Glow-in-the-dark paint has tiny special bits inside called phosphors. These bits soak up light like a sponge. Later, when it gets dark, they let the light out slowly, which is why the paint glows. If you shine a flashlight or blacklight on the jar first, it glows even brighter!
Learning Opportunities for Kids
This experiment can easily become an engaging teaching tool both at home and in the classroom. Consider trying these approaches:
- Science Journaling: Encourage kids to sketch their jar before and after the glowing display, describing the changes they observe.
- Making Predictions: Before starting, ask, “What do you think will happen when we add this mixture to the water?”
- Cause and Effect: Talk about why the droplets sank or what influenced the brightness of the glow.
- Vocabulary Growth: Introduce words like phosphorescence, density, immiscible, and molecule.
To deepen the lesson, you could pair this experiment with a short book or discussion on light, color, or the science of glowing objects.
Wrapping Up Your DIY Lava Lamp for Kids
You did it—you made your very own lava lamp! 🎉 Watching the bubbles rise and fall is not only fun but also shows you a little bit of science in action.
Remember, your DIY Lava Lamp for Kids is more than just a cool project. It’s a way to explore how liquids work together, how reactions happen, and how science can be just as exciting as playtime.
So the next time you want a fun activity on a rainy afternoon, a science fair idea, or just something amazing to show your friends, you’ll know exactly what to do—make another lava lamp and let the fun bubble up again!

Keep kids active and smiling with Easter games for kids! Try fun ideas like egg hunts, silly races, and hands-on holiday challenges.
Parent’s Guide to Mario Kart World: What Families Should Know
If your kids have been talking nonstop about Mario Kart World, you might be wondering what makes this game so exciting. As the newest entry in the beloved Mario Kart series and a launch title for the Nintendo Switch 2, it introduces bigger races, new mechanics, and even an open-world map. Before you decide if it’s right for your family, let’s explore what’s new and what parents should know.
Positive Changes That Make the Game Stand Out
To start, Mario Kart World is more than just an update to the classic racing formula. Nintendo added new mechanics like wall-riding, rail grinding, and charged jumps, which give players more ways to build speed and avoid obstacles. These changes make races more dynamic and reward skillful driving instead of relying only on luck.
Building on these improvements, the game also features up to 24 racers at once—the largest player count in Mario Kart history. That means bigger, more exciting races, especially for families who love multiplayer fun.
A New World to Explore
Next, let’s talk about the setting. Unlike previous titles, Mario Kart World features an interconnected map that lets players explore between races. You can drive through deserts, forests, coasts, and volcanoes without long loading screens. Weather effects like rain and fog make each track feel alive and add variety to every race.
These expansive worlds give kids room to explore while also encouraging creativity. However, if your family prefers quick races, the classic Grand Prix and Battle modes are still included.
New Characters and Unlockables
After exploring the new maps, families will love meeting the expanded roster of 50+ playable characters. Along with classic favorites like Mario, Peach, and Bowser, newcomers like Goomba and Spike join the fun. Unlockable costumes and collectible items keep the gameplay fresh and give kids something to work toward.
These rewards are earned by completing challenges or exploring the Free Roam mode. This helps encourage teamwork and friendly competition among siblings who want to see who can unlock the next character first.
Modes That Fit Every Play Style
Moving on to how the game can be played, Mario Kart World offers several modes to fit different ages and skill levels. The Knockout Tour mode is a fast-paced elimination race praised by reviewers for its excitement. Free Roam mode lets players explore and complete missions, though some reviewers noted it isn’t as polished as the traditional tracks. Battle Mode also returns, perfect for younger kids who enjoy shorter, fun-focused matches.
These options allow parents to find a mode that works best for family play, whether that’s casual exploration or competitive racing.
Tips and Tricks for Parents
Before your kids hit the track, there are a few things that can make family play smoother. Encourage them to practice wall-riding and rail grinding to improve their racing skills. Start younger players in Battle Mode to help them learn the controls in a low-pressure environment. Finally, use the Nintendo Switch 2’s updated parental controls to set time limits and manage online features.
By planning ahead, parents can help kids enjoy the game while keeping screen time balanced.
Mastering Items for a Competitive Edge in Mario Kart World
Before wrapping up, it’s worth learning how to use items wisely. In Mario Kart World, items can turn the tide of a race—especially in bigger 24-player matches where chaos is everywhere. Teaching kids how each item works can help them plan ahead rather than just pressing buttons at random.
- Coin Shell – Throw it to scatter coins on the track. Grab them quickly for a speed boost and point bonus.
- Kamek Spell – Cast it to transform rivals, causing unpredictable effects that can slow them down.
- Feather – Use this to super jump over attacks or obstacles. Great for dodging hazards at the last second.
- ? Block – Press repeatedly to generate coins and get a brief speed boost. Perfect for quick sprints to the finish line.
- Hammer – Knock out opponents and leave the hammer as a short-term obstacle behind you.
And don’t miss Yoshi’s Restaurants scattered around the map! Stopping by one grants a Dash Food Item, boosting speed and sometimes unlocking a surprise outfit inspired by the location.
Final Thoughts: Is Mario Kart World Worth It for Families?
In conclusion, Mario Kart World blends familiar racing fun with exciting new features like bigger player counts, open-world maps, and skill-based driving mechanics. While some elements—like Free Roam—feel less polished, the overall package offers hours of family-friendly entertainment.
If you’re looking for a game that kids and parents can enjoy together, Mario Kart World is a strong choice. Grab a controller, choose your favorite character, and get ready for a family race you won’t forget!

Learn tips for setting gaming boundaries for kids, understanding games, and creating smooth transitions for your little one.