

Category: Easy Crafts for Kids
Dollar Store DIY Christmas Decor for the Porch

When the holiday season approaches, many moms start searching for Dollar Store DIY Christmas Decor that looks festive without adding stress. Decorating for Christmas doesn’t have to mean expensive store runs or complicated projects. This peppermint lollipop decoration is affordable, simple, and easy enough to make in one afternoon. It’s perfect for porches, entryways, or holiday planters, and it uses supplies you can grab quickly at the Dollar Store. Now that you know why this project works so well, let’s talk about why moms love crafts like this.
Why Moms Love Dollar Store DIY Christmas Decor
For busy moms, holiday decorating needs to be quick, budget-friendly, and realistic. Dollar Store DIY Christmas Decor checks all those boxes because it keeps costs low and prep time short. This project doesn’t require special tools or crafting experience, and it can be done while kids are nearby—or even helping. Best of all, the finished decoration looks cheerful and store-bought without the high price tag. With that in mind, let’s gather everything you’ll need to get started.

Supplies Needed for This Easy Christmas Decoration
Before starting any DIY project, having all your supplies ready makes the process much smoother.
- White paper plate(s) (sturdy works best—9–10″)
- Red acrylic paint (and optional green if you want mixed colors)
- Paintbrush (medium/flat brush)
- Clear cellophane wrap (basket wrap or big clear treat bags)
- Ribbon (red/green)
- Wooden dowel(s) or bamboo garden stakes (for the “lollipop stick”)
- Hot glue gun + glue sticks (or strong tape)
- Optional: clear spray sealer (to protect from moisture)
Once your supplies are ready, it’s time to start crafting.
Step-by-Step Guide to Making a Peppermint Lollipop Decoration
Start With Clean Plates
To begin this Dollar Store DIY Christmas Decor project, grab a plain white paper plate. If your plate feels flimsy, make it sturdier by hot-gluing two plates back-to-back. This helps your decoration hold its shape, especially if you plan to display it outdoors. Once your base is strong, you’re ready to paint.
Flip the Plates Upside Down
Next, turn the plate upside down so the raised back side is facing up. This is the side you’ll paint because it creates the rounded “candy” look when finished. After flipping it over, you can start planning the swirl design.

Create the Peppermint Swirls
Now it’s time to paint the classic peppermint pattern. Imagine the plate is a clock and paint curved “pinwheel” wedges that twist outward from the center. Paint one red wedge, then leave the next space white, and repeat until you go all the way around. Most plates look best with about 6–8 red swirls, so try to keep your wedges roughly even.
Let It Dry Completely
Once the swirl is painted, let the plate dry fully before moving on. If the red looks light or streaky, add a second coat and let it dry again. For outdoor Dollar Store DIY Christmas Decor, you can also spray a clear sealer over the paint once it’s dry to help protect it from moisture.
Tie It Off With Ribbon
After the paint is dry, lay a large sheet of clear cellophane flat on a table. Place the painted plate in the center with the design facing outward. Pull the cellophane up and around the plate, then gather it at the bottom like you’re wrapping a real lollipop. When it’s gathered neatly, you’re ready to secure it.
Add the Lollipop Stick
Now attach the dowel or garden stake to create the lollipop stick. Place the stick along the gathered bottom and hot glue it firmly to the wrapped area. For extra strength, you can tape it first and then hot glue over the tape. If you’re making porch pot lollipops, use a longer stake so it stands upright in foam or soil.
Display Your Dollar Store DIY Christmas Decor
Finally, put your peppermint lollipop decoration on display. Stick the stake into a porch planter using a foam block inside the pot for stability, or tie it onto a wreath or door décor setup. Grouping a few together in red and green makes the whole display look even more eye-catching.
Conclusion
In the end, Dollar Store DIY Christmas Decor like this peppermint lollipop proves that holiday decorating doesn’t have to be overwhelming. This project is affordable, quick, and easy to fit into a busy schedule. Whether you make one or a whole set, it’s a simple way to bring Christmas cheer into your home without overspending. And just like that, your space feels festive, cozy, and ready for the season.

Recycled winter crafts for kids made easy with DIY Mini Nutcrackers using toilet paper rolls. A fun, affordable holiday craft for home or school!
Easy Winter Crafts for Kids to Keep Them Busy Before Dinner
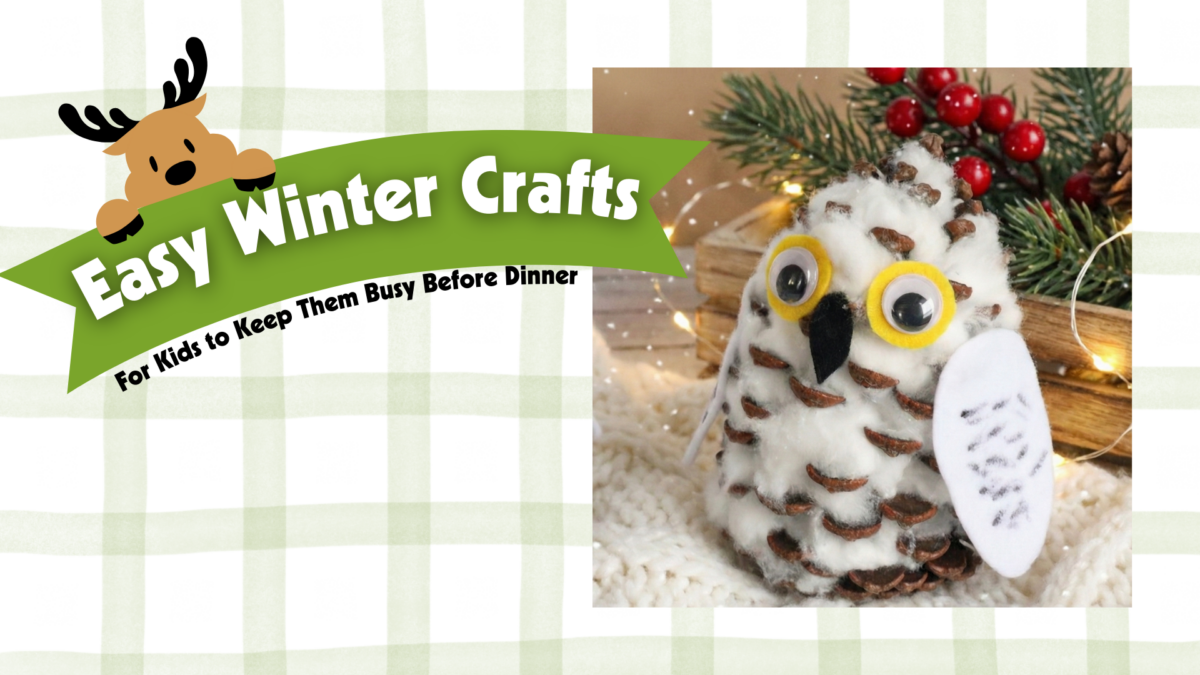
During the winter season, kids are often looking for something fun to keep them busy—and that’s where easy winter crafts for kids come in handy. This Snowy Owl Pine Cone Craft is the perfect mix of easy, adorable, and low-mess, making it an ideal activity. All you need are a few basic supplies and a handful of cotton balls to transform an ordinary pine cone into a fluffy little owl.
Before we jump into the steps, let’s walk through what makes this craft such a great choice: it keeps kids entertained, encourages creativity, and results in a charming fall decoration they’ll be excited to show off.

Supplies
- Medium sized Pine cones
- Black, yellow, and white felt
- Large Googly eyes
- Sharpie marker
- 15 Cotton balls per Owl
- Hot glue or Tacky Glue
Directions
Now that you’ve gathered your supplies, it’s time to bring these cute snowy owls to life. These steps are simple enough for kids to follow with just a little guidance—especially if you’re using tacky glue instead of hot glue.
- Prep Your Pine Cones – Make sure each pine cone is clean and dry. Shake out any loose pieces so the cotton will adhere well.
- Add the Fluffy Owl Feathers – Pull apart the cotton balls slightly, then tuck small pieces into the gaps of the pine cone. Cover the entire pine cone until it looks soft and snowy, leaving the bottom open so it sits flat.
- Create the Face – Cut a small yellow felt triangle for the beak and two white felt circles for the eye bases. Use the sharpie to outline the edges if your child wants extra detail.
- Attach the Eyes – Glue the white felt circles onto the front of the pine cone, then add the large googly eyes on top. Place the yellow felt beak just below the eyes.
- Add Wings and Feet (Optional) – For extra personality, cut small wing shapes from black felt and glue them to the sides. You can also cut two tiny felt feet to glue at the bottom.
- Let It Dry – Allow the glue to fully dry before moving the owl. If you’re using hot glue, this step will be quick; tacky glue may take a bit longer.
Once the owl is dry, your kids will have a charming fall decoration that’s perfect for the table, mantel, or even as part of a Thanksgiving centerpiece.
Conclusion
With your snowy owl pine cones complete, your kids will feel proud of the whimsical woodland creatures they’ve created—and you’ll enjoy a little extra time to focus on dinner. This craft is simple, cozy, and full of seasonal charm, giving kids a fun way to participate in the holiday atmosphere.
As you wrap up this activity, encourage the kids to display their owls somewhere special or gift them to family members arriving for dinner. It’s a sweet way to spark conversation and celebrate their creativity.
And just like that, you’ve kept little hands busy, added a touch of fall magic to your home, and created a memory that makes the holidays feel even more meaningful.